If you’re configuring a Spring Boot application, you’ve likely used the @Value annotation to inject configuration values from application.properties or application.yml. It seems straightforward—but there are important subtleties to be aware of. In this post, I’ll break down the key caveats and share practical examples from my own backend development experience.
⏰ 1. Timing: When Does @Value Injection Happen?
@Value injection occurs during the Spring component initialization phase. This means that:
- The target class must be a Spring managed bean—annotated with
@Component,@Service,@Controller, etc. - Without component scanning, Spring won’t instantiate it, and the
@Valuefields will remain uninitialized.
Real-world hiccup:
I once had an email service class without @Component. I was expecting SMTP host and port from the config, but got a null pointer error instead—because Spring never injected the values. The fix? Just add @Component to ensure Spring manages the bean.
🧩 2. Field vs Constructor vs Setter Injection
Like dependency injection, @Value supports different injection styles, each with its pros and cons:
- Field injection (easiest): java복사편집

🔹 Quick and concise, but hard to test and hides dependencies.
Setter injection:
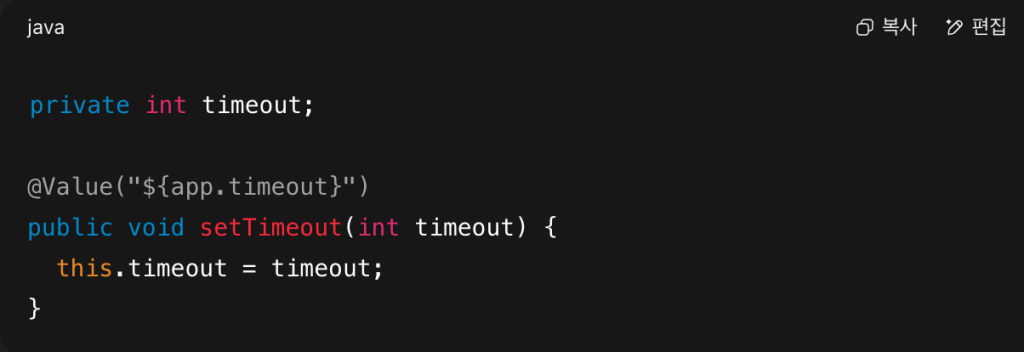
🔹 Improves testability and clarity, but more verbose.
Constructor injection:
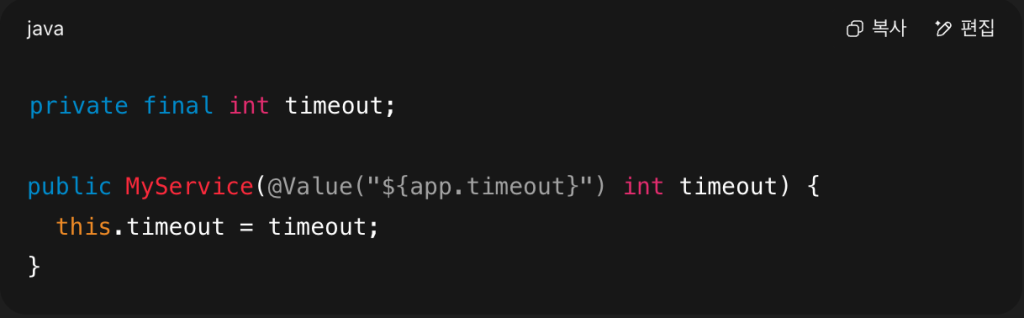
- 🔹 Best for immutability and ease of testing—dependencies are explicit and must be provided to create the bean.
Advice: Prefer constructor injection for clarity and immutability, especially in larger apps.
📁 3. Configuration Files: Path and Resolution Order
To use @Value, you must ensure:
- The configuration file (e.g.,
application.yamlorapplication.properties) is located on the classpath. - If multiple files are present, be mindful of their resolution order—
application-{profile}.propertiesmay override defaults.
Example: I once changed a dev-only endpoint in application-dev.yml, but forgot to enable the dev profile. My application still used the default config and made network calls to production APIs—an embarrassing oversight that taught me always double-check active profiles.
🔄 4. Single Values vs Structured Binding
@Value is perfect for injecting single scalar values, such as:

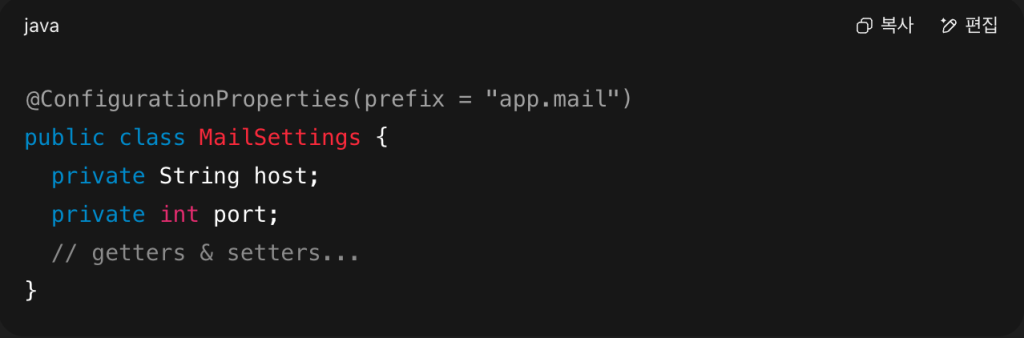
But it lacks support for relaxed binding or binding multiple related properties. For those use cases, @ConfigurationProperties is far better:
- Supports Relaxed Binding (camelCase, kebab-case, etc.)
- Binds maps or whole classes (e.g.,
MailProperties,DataSourceProperties) cleanly.
Usage example:
This approach is more maintainable and error-resistant than spreading many @Value annotations across your code.
✅ Quick Summary
| Aspect | @Value | @ConfigurationProperties |
|---|---|---|
| Inject single value | ✅ Yes | ⚠️ Not ideal |
| Inject multiple properties | ❌ Requires multiple annotations | ✅ Binds many related values |
| Relaxed binding support | ❌ No | ✅ Yes |
| Testability & structure | ⚠️ Harder with many fields | ✅ Cleaner with POJO classes |
✅ Final Tips
- Ensure your class is a Spring bean before using
@Value. - Prefer constructor or setter injection over field injection.
- Verify your configuration files are on the classpath and the correct Spring profile is active.
- For complex settings or multiple related properties, favor
@ConfigurationProperties.
When used correctly, @Value is a lightweight and powerful tool for injecting configuration. But misusing it can lead to null values, confusing bugs, or brittle code. By following these guidelines, you’ll write cleaner, more maintainable Spring applications.
